You know those lightweight plastic bags supermarkets and greengrocers have for you to put your fruit and veg into? They’re another source of pollution it’s really easy to remove from y0ur life.
You’ll need:
- some lightweight fabric – poplin is good, old net curtains even better. The lighter the better as they are weighed with your produce and charged at the same rate.
- two sheets of A4 paper (preferably some you’ve saved from recycling), a ruler, pencil and glue
- cord – about 75cm for this pattern, but longer if you make bigger ones
- sewing machine, thread and pins.
First, make your pattern
Take one of the sheets of paper and fold it in half lengthwise, glue the other sheet along that centre line. On the right edge, measure down 6cm and mark. This is your marker for where the drawstring goes.

To make your pattern, take two A4 sheets of paper and fold one in half.

Glue your two sheets together at the centre line.
Mark the right hand edge at 6cm.
Use the pattern to cut your fabric
Fold your fabric, right side to right side, and pin the pattern to the fabric.

Fold your fabric right side to right side. Use your pattern piece to cut your fabric. Don’t forget to cut a notch on the right hand side, where you marked the drawstring opening.
Don’t forget to cut a notch on the right edge where you marked the drawstring entry point. Since you’re going to need quite a few of these bags, cut them all out now. It’s faster.
Now, sew your vegie bag!
First, sew the right side from the notch to the bottom. Use a straight stitch that’s quite small.
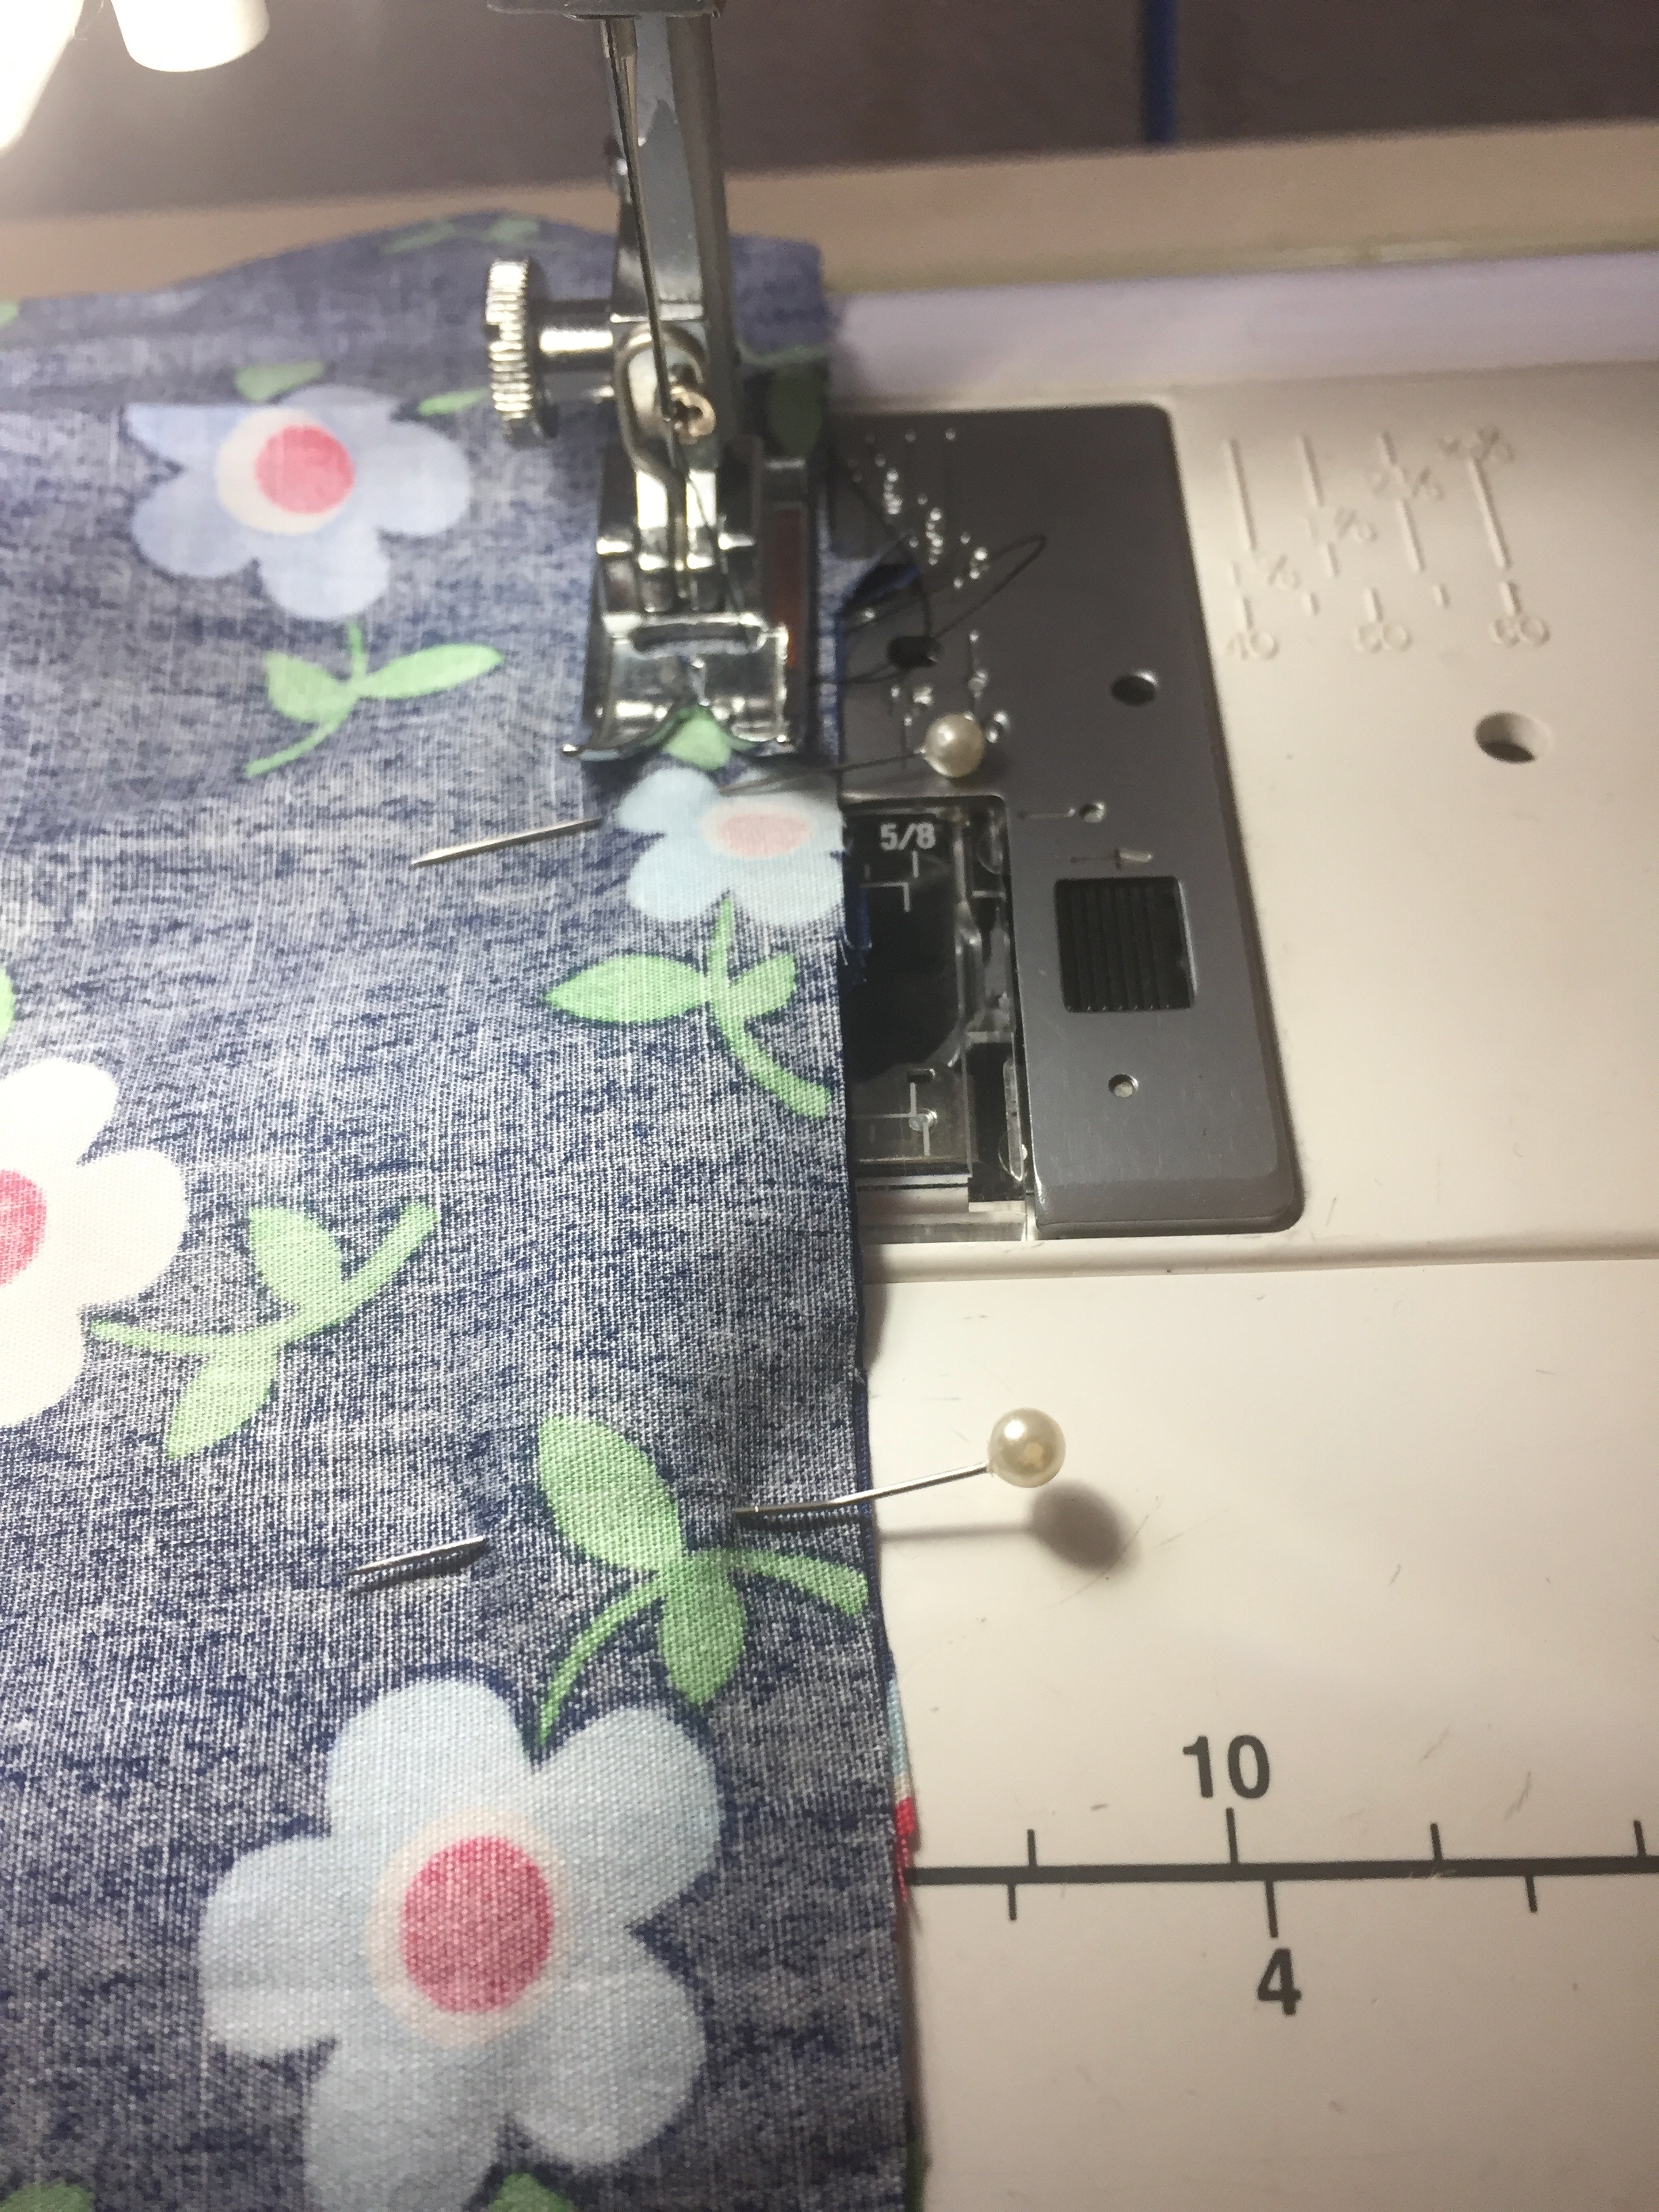
On the right side, start your seam at the notch. Use small stitches, you want this to be secure.
It should look like this.

Then you can finger-press (or use an iron) to flatten the seam allowances up to the top of the bag.

Finger-press the seam allowances flat on the inside.
Change your sewing machine to a tight zig-zag and sew around the drawstring opening.
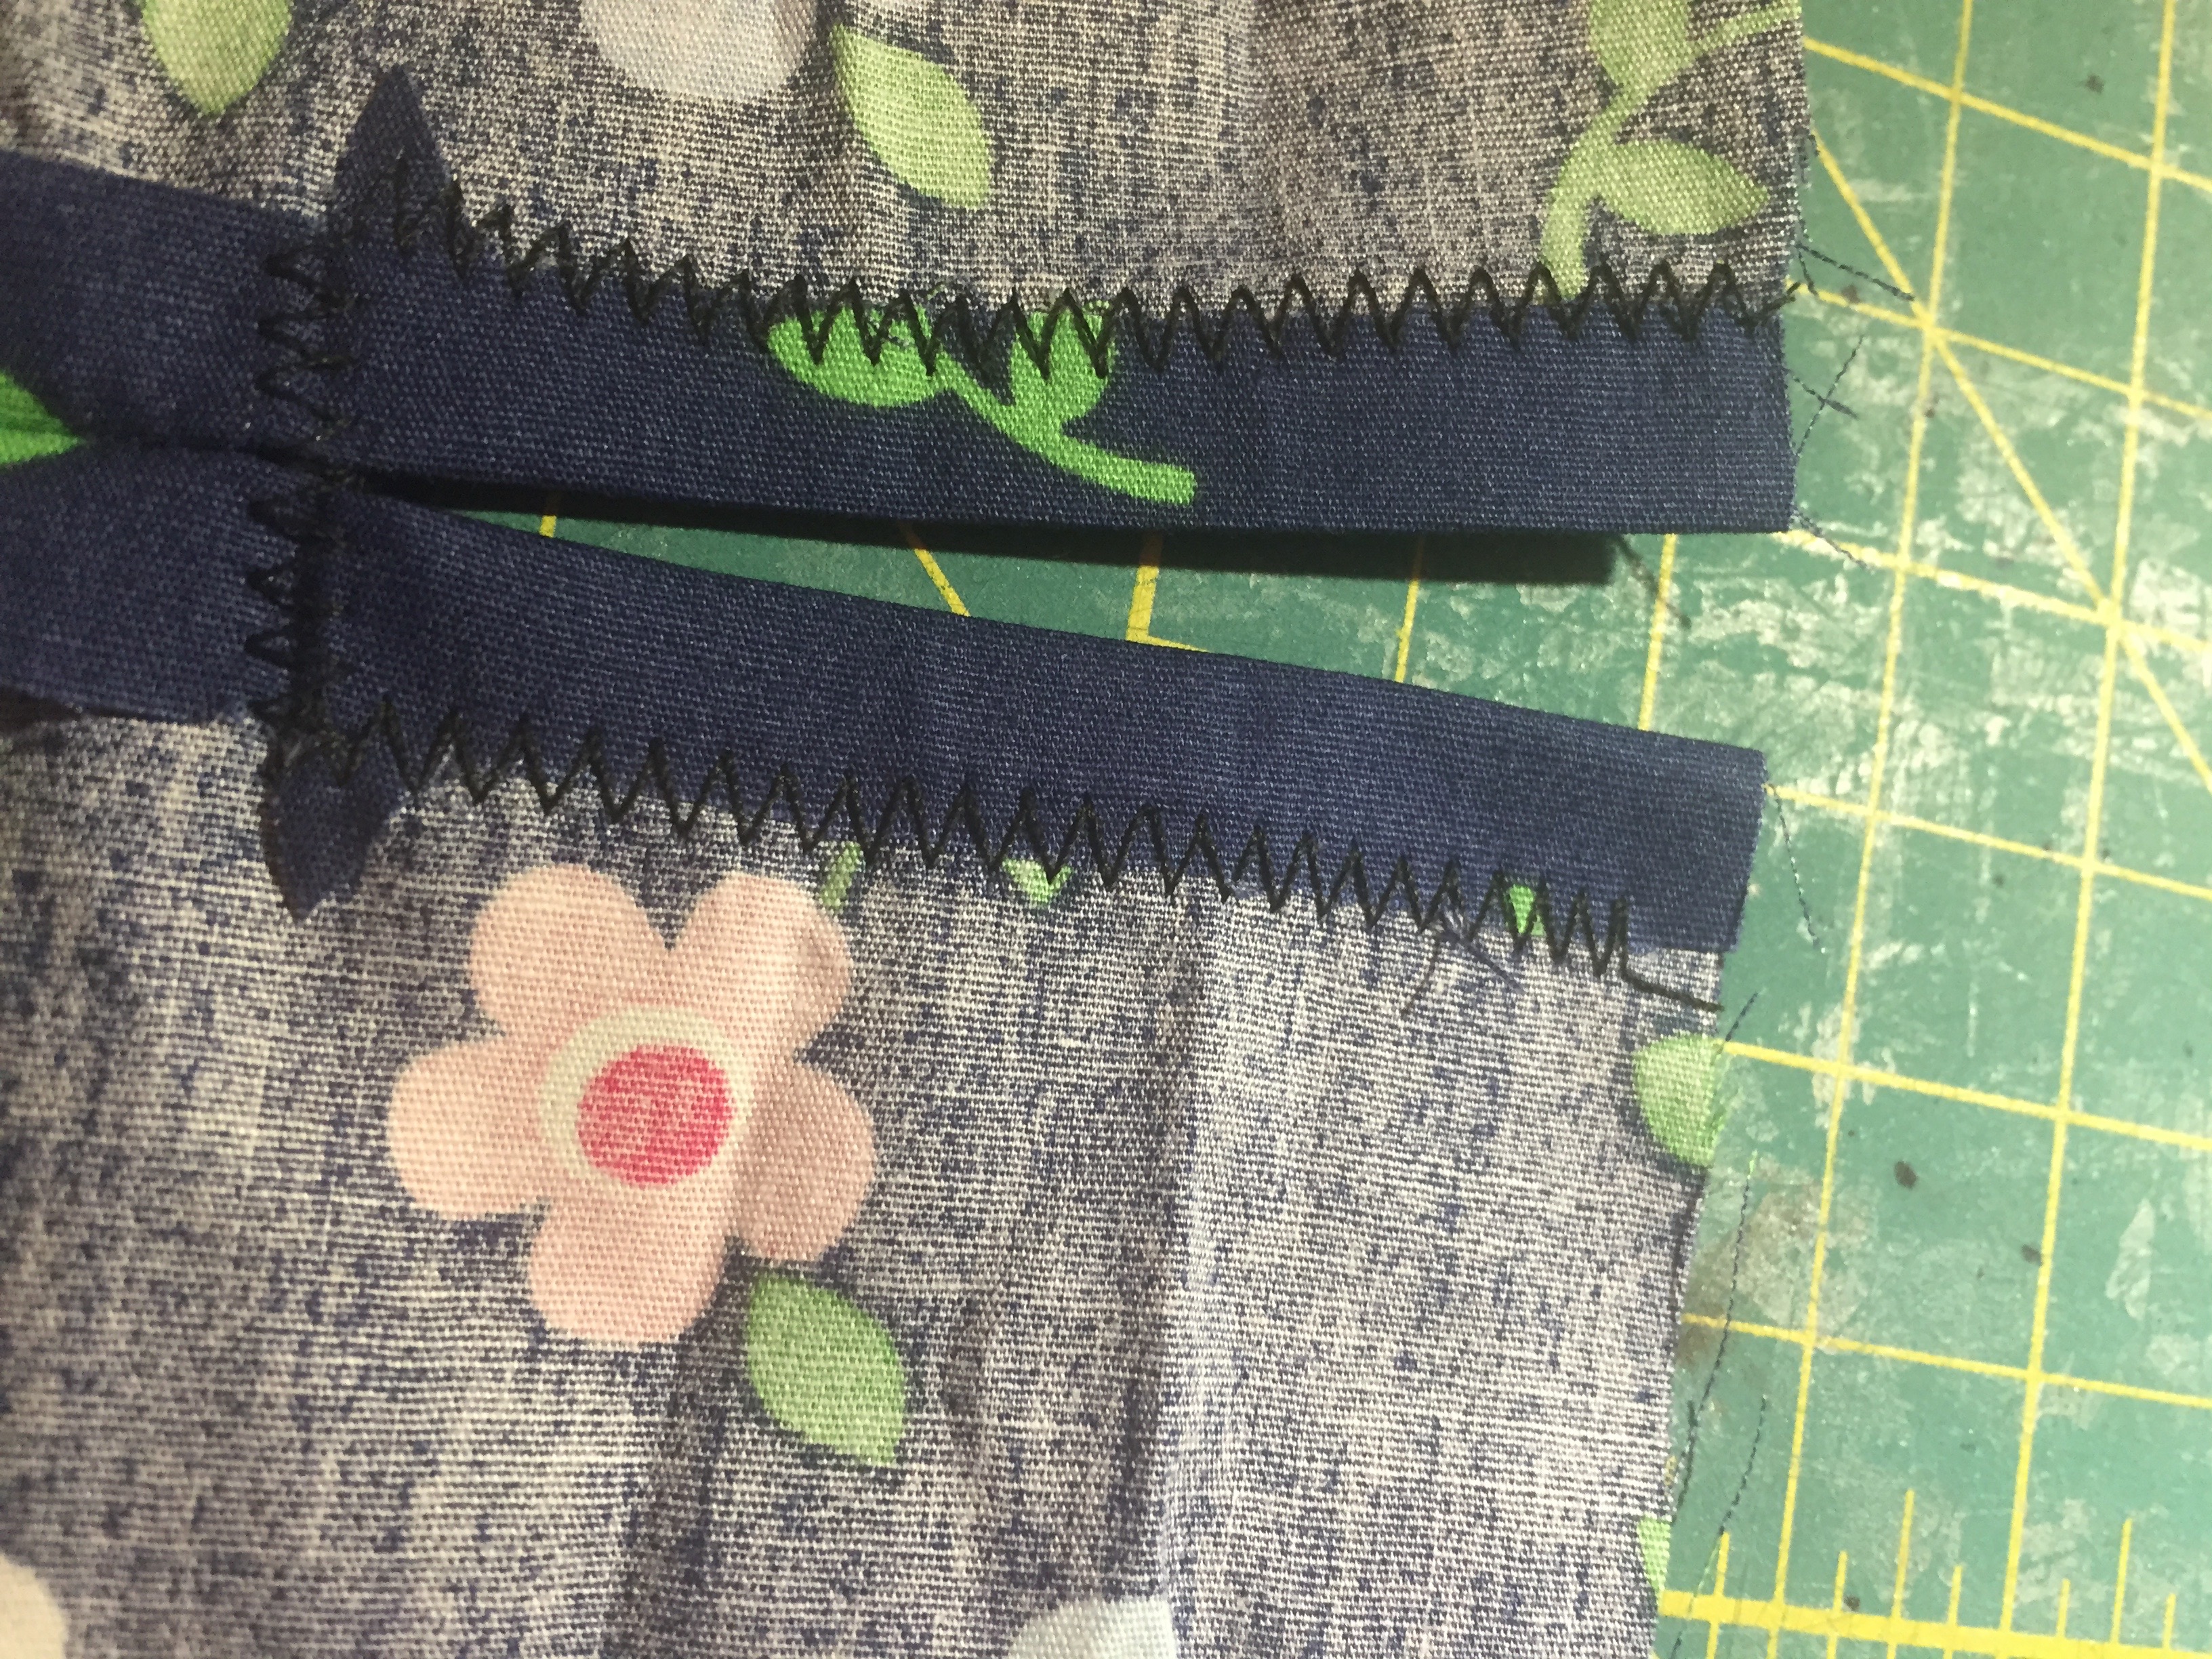
Using a tight zig-zag stitch, sew around the drawstring opening.
Change your stitch back to straight stitch, and sew the other two sides of your bag.

Using straight stitch, sew along the bottom and left hand side of the bag.
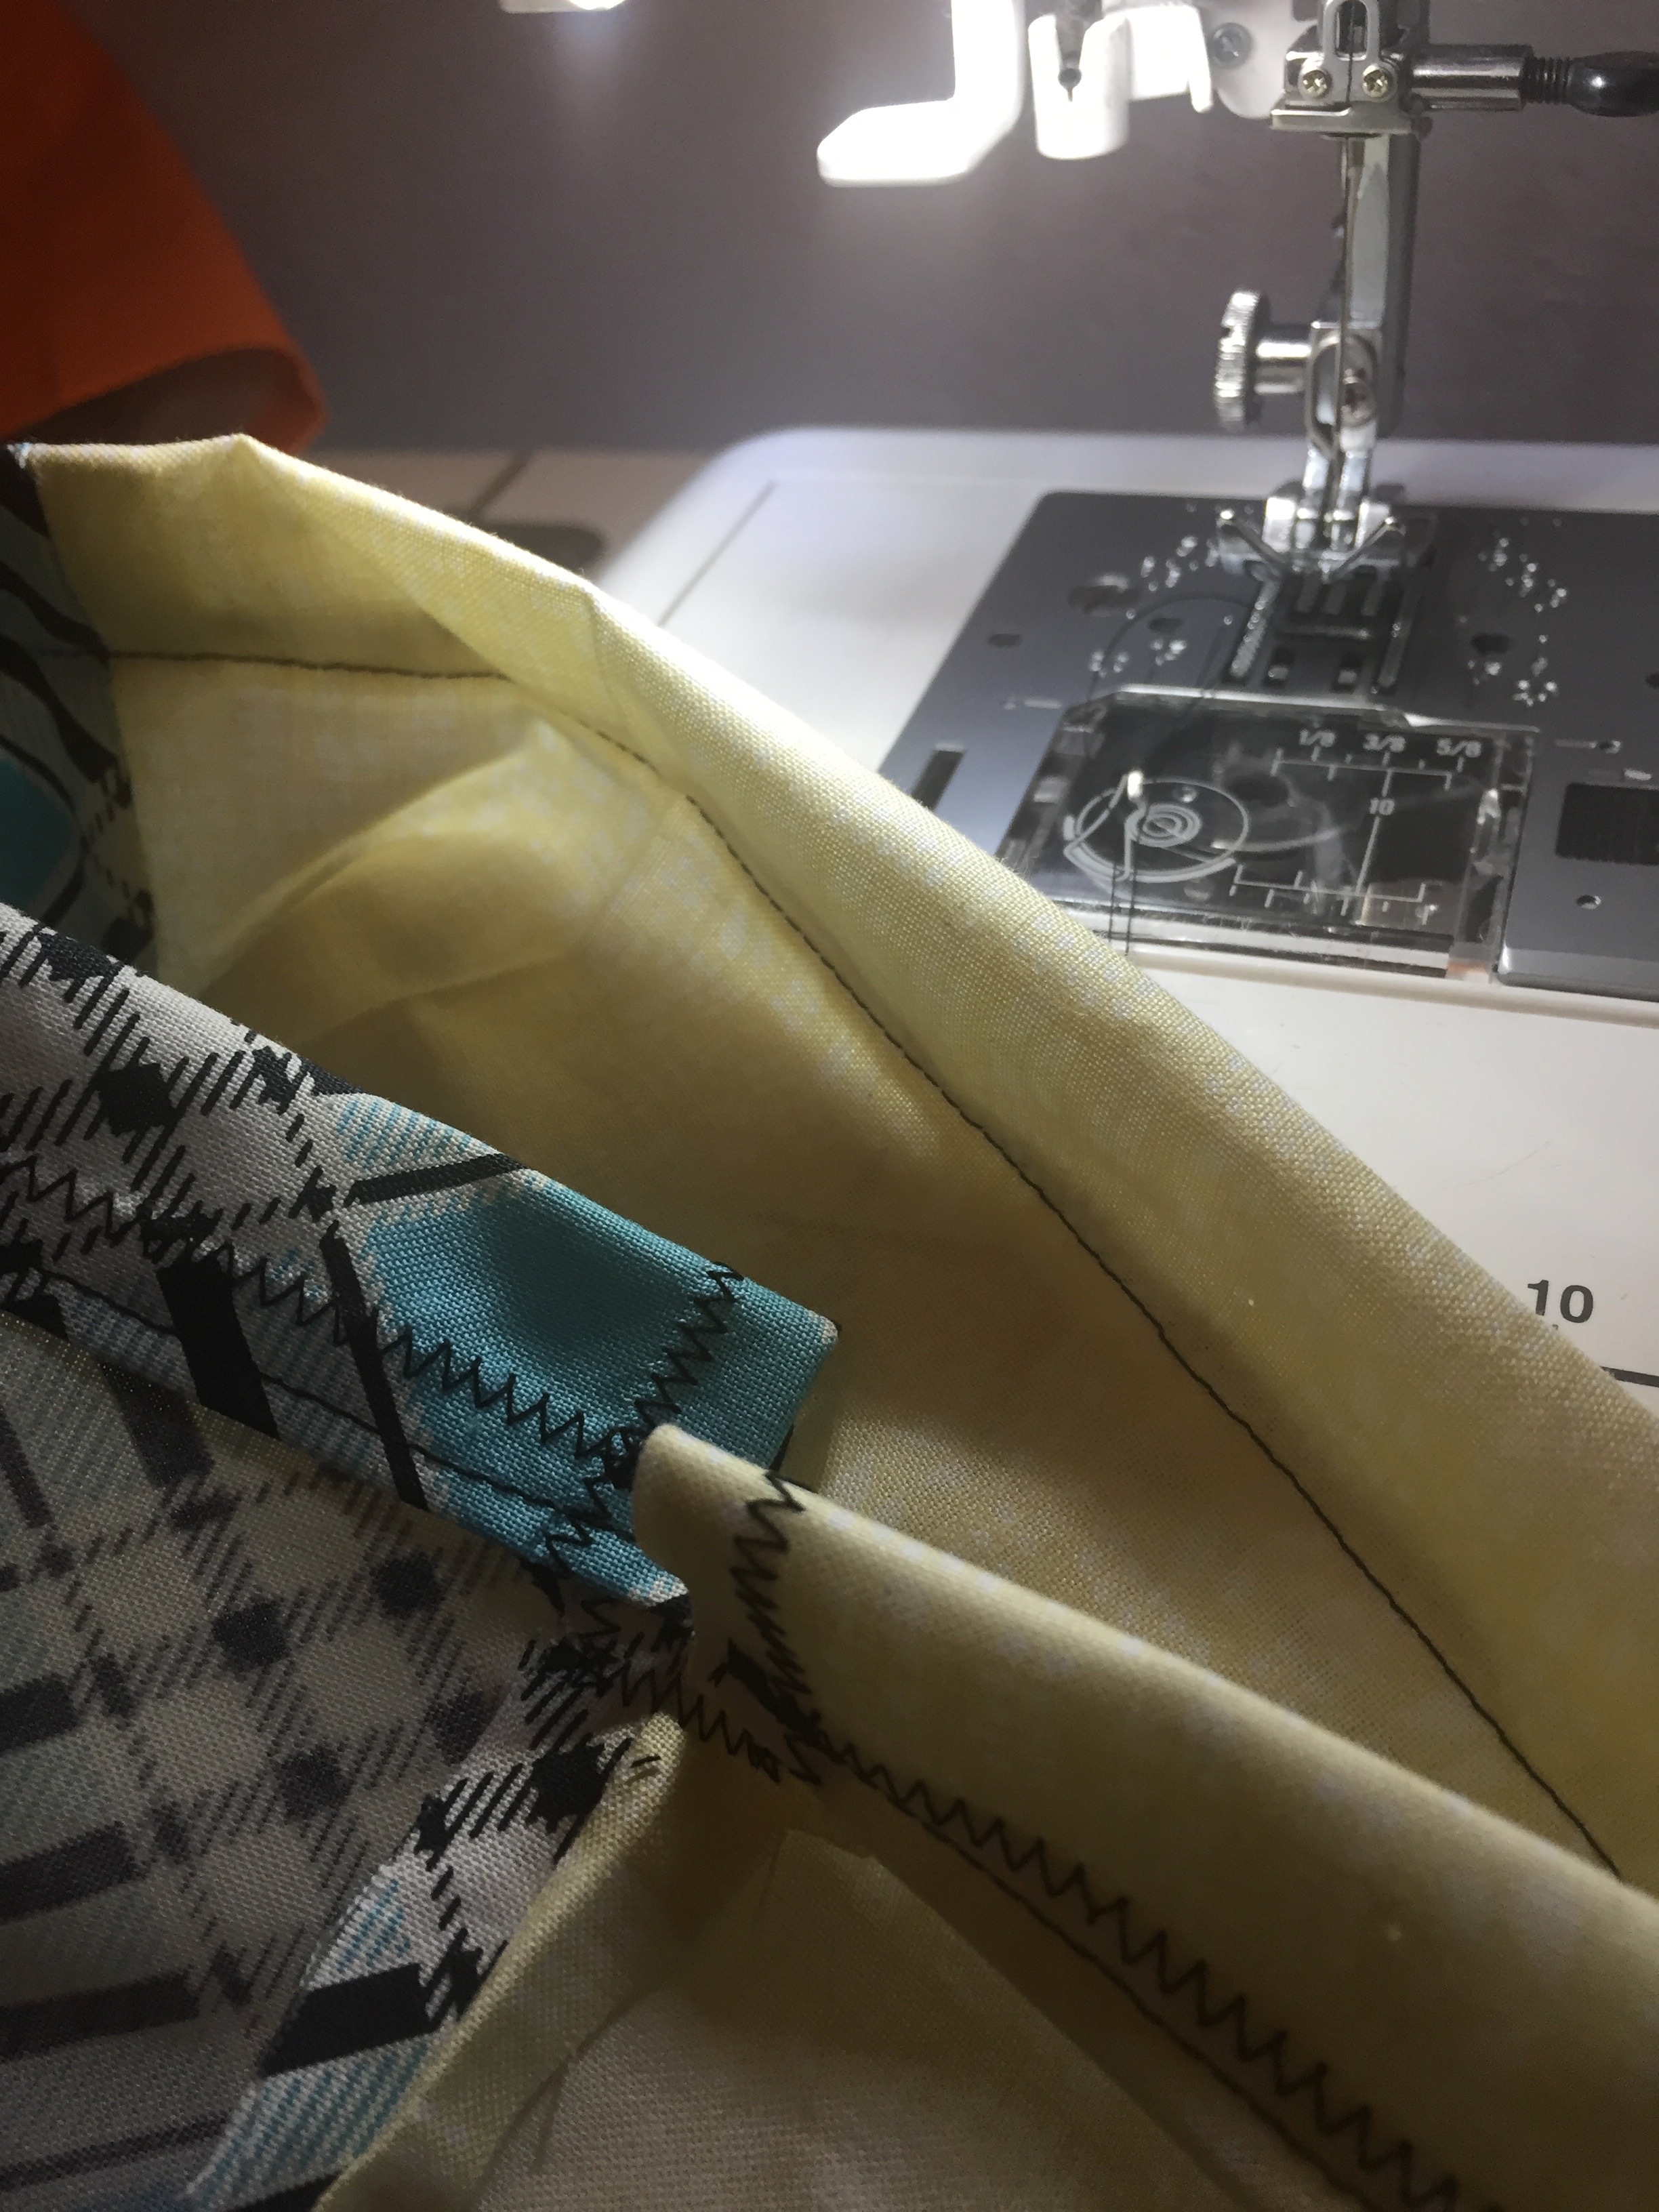
Now, sew the tunnel for the drawstring.
Using your zig-zag, sew a narrow hem along the top of the bag.

Zig-zag a narrow hem along the top of the bag.
Then fold down a wider hem, and use your straight stitch to sew down the edge to make a tunnel for the drawstring. Start and end at the drawstring entry point.

Sew a tunnel for the drawstring.
You should see two entry points for the drawstring.
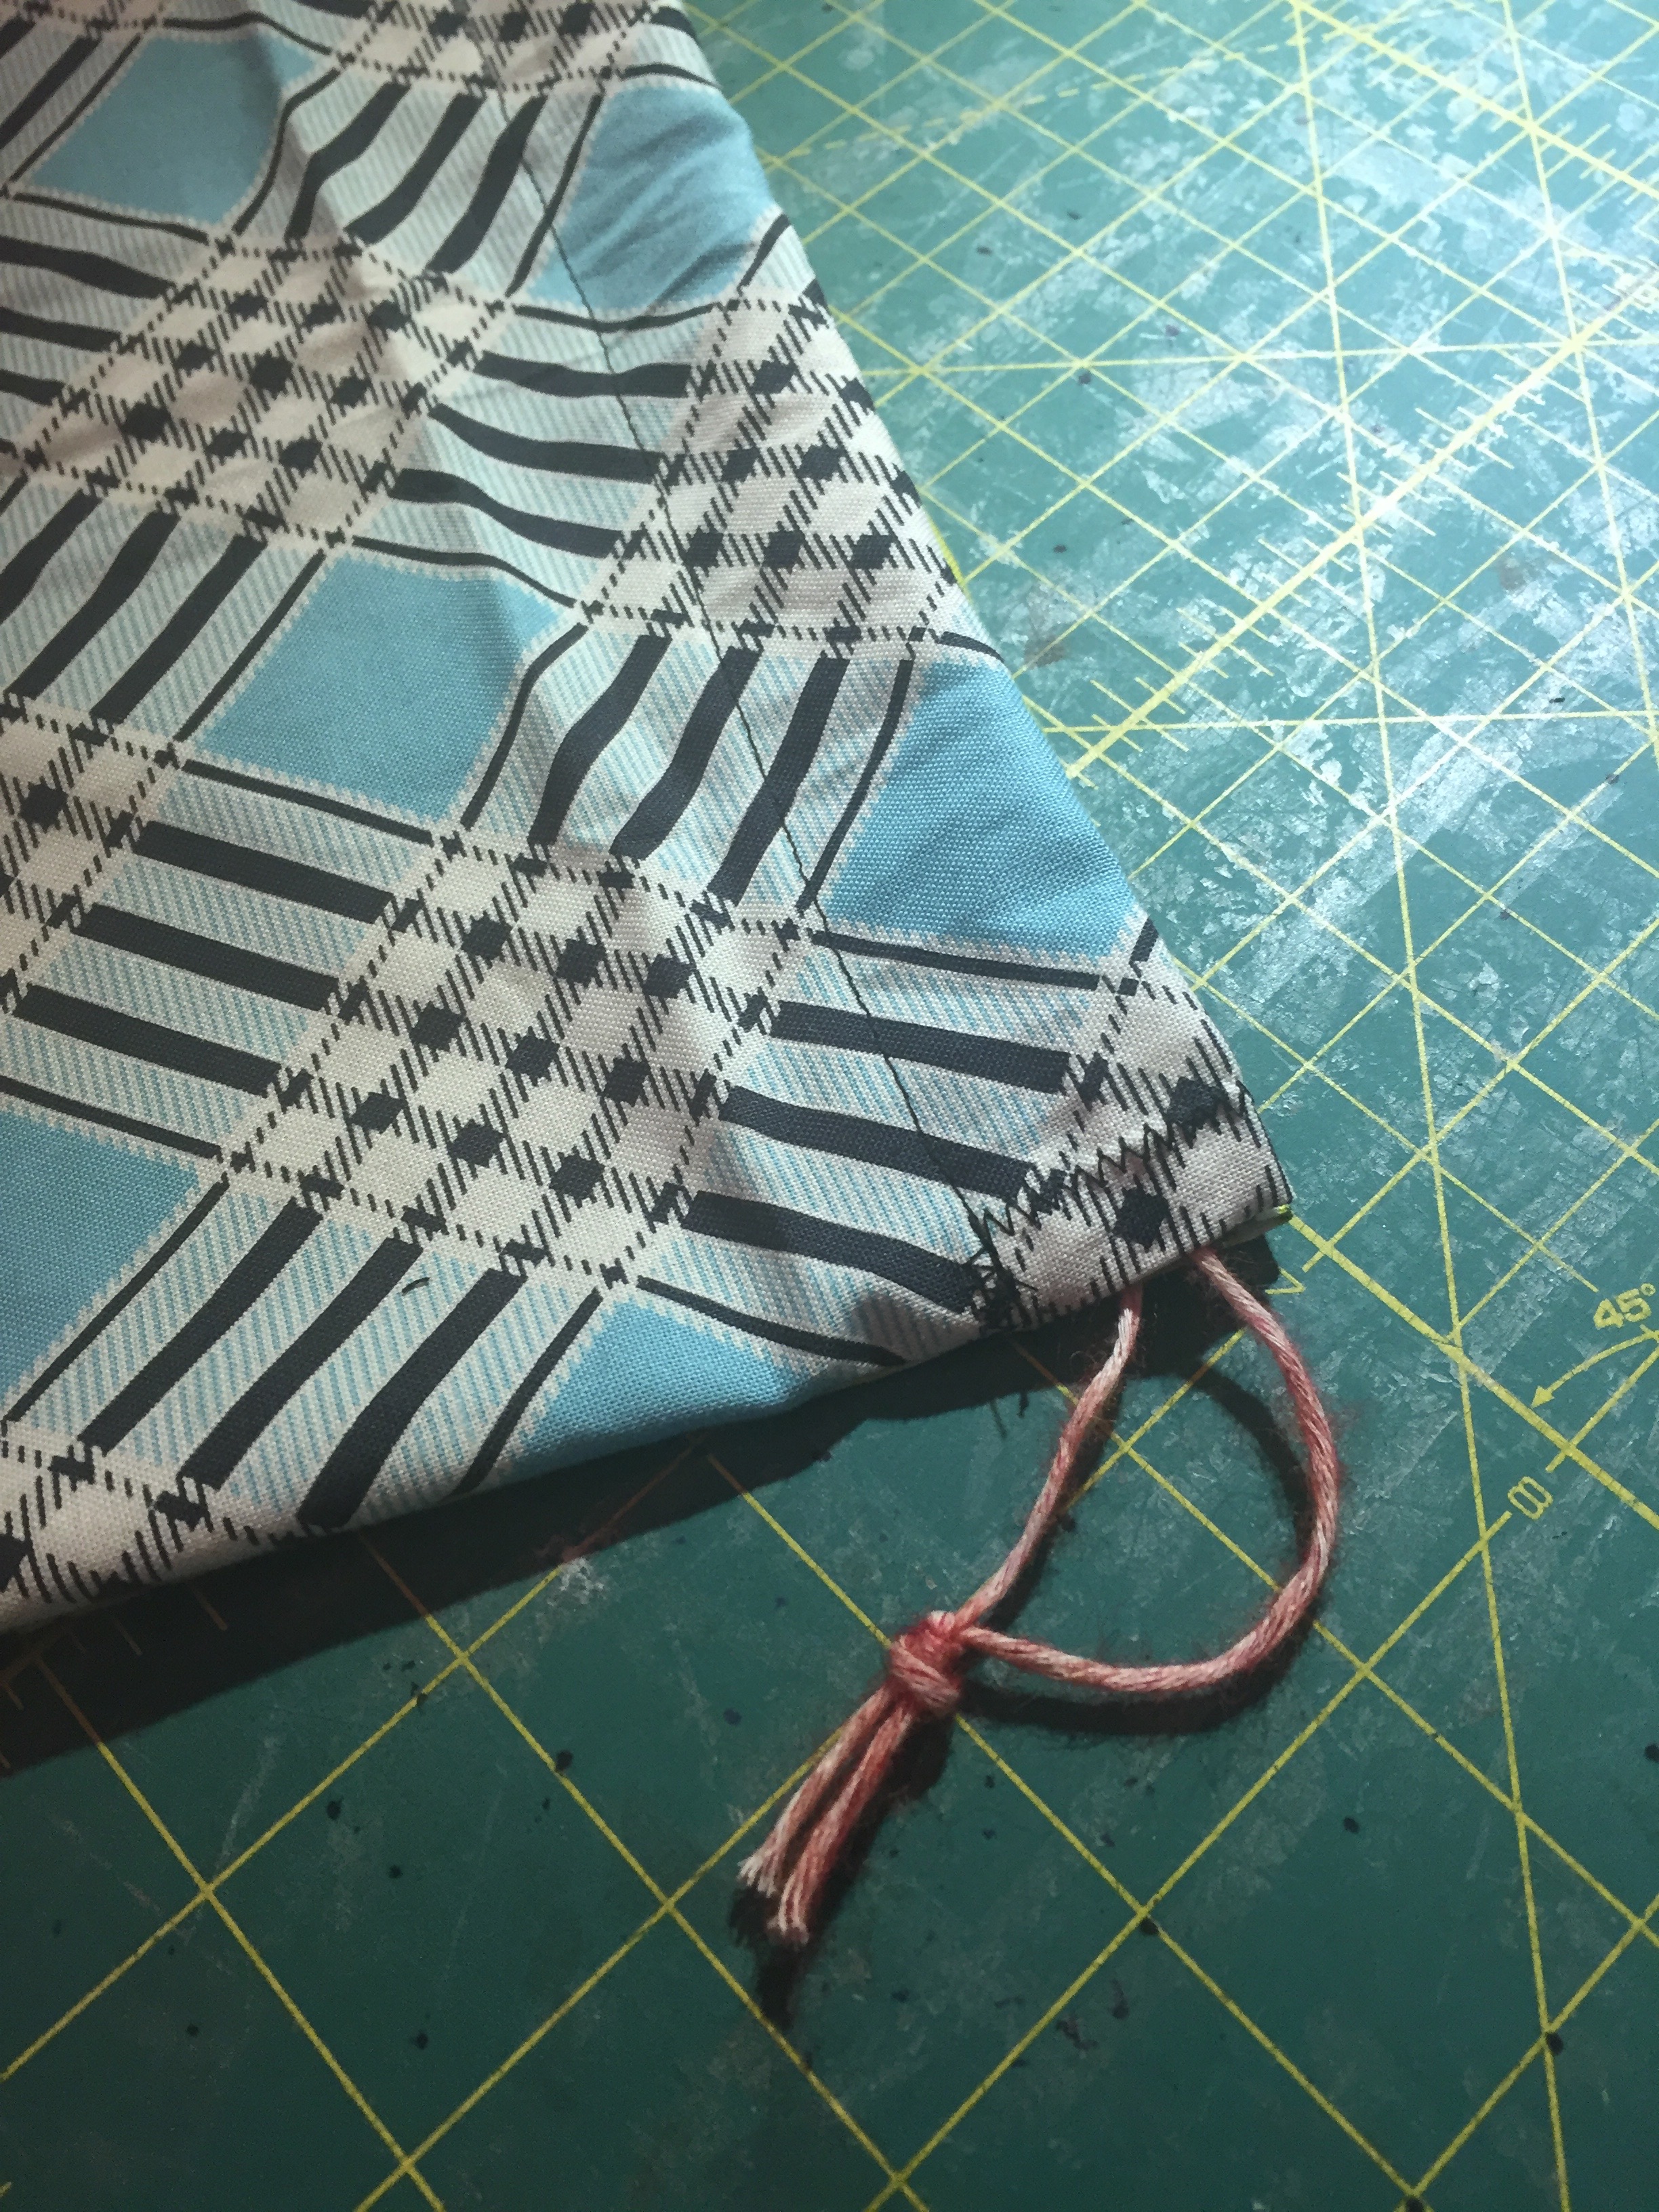
Nearly done – just measure and thread in your drawstring.
For this pattern, the cord needs to be about 75cm long. If you’re using a different size pattern, measure across the top of the bag two and a bit times.

Your drawstring needs to be just a bit longer than the tunnel it goes in.
Lastly, using a safety pin (tie one end of your drawstring cord to the safety pin), thread your drawstring through the tunnel and tie the ends together so it doesn’t unthread itself.

And you’re done! Time to head to the market!
Happy shopping!
Of course you can make drawstring bags any size you need. You could make small ones for spices or much larger ones for flour or lentils. They’re handy for separating your luggage when travelling, or you could use them for kids’ laundry.