On Sunday 21st February the Kitchen Gardeners’ Group met in Guildford for a Compost workshop. It was great to see many people turn up to be inspired by compost making. Our presenters looked at cold composting, hot composting, Bokashi bins and Black Soldier flies. Each system had its different requirements and advantages.
Hot composting requires you to have all the ingredient ready and someone to hold a hose while your building the pile. You will need ¾ of dry matter (carbon rich); that is dry leaves, mulch, paper, any dry plant matter and approximately ¼ of green matter (higher nitrogen); that could be grass, any leafy vegetable, green prunings. You can also add some high nitrogen like chicken droppings/manures, coffee grounds, and a bit of blood and bone as a starter.

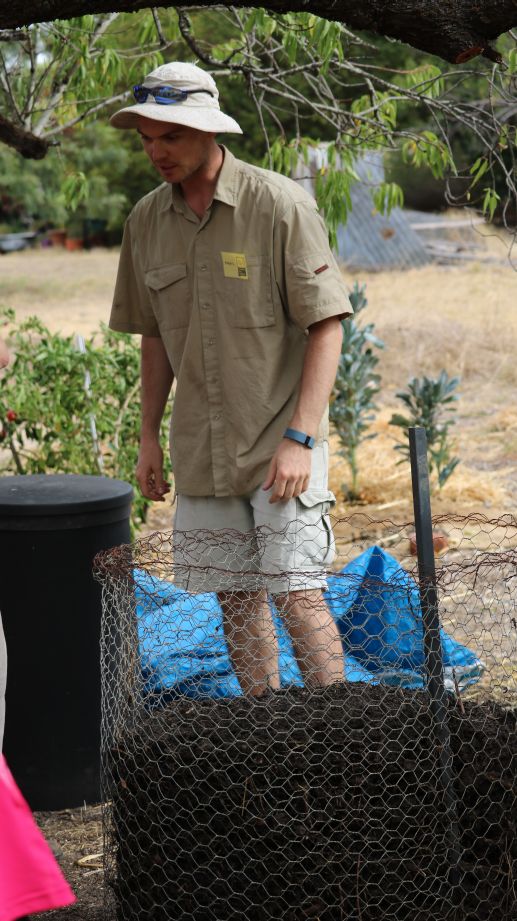
Peter explaining hot composting with wire cages.
You can use mesh to make a container with > 1 meter diameter and fill this with different layers of brown and green matter, soaking it all as you go (the moisture should be like a squeezed sponge). With a small sprinkling of high nitrogen or rock dust occasionally added.

Making a new pile of hot compost is easier with support
Once the container is full cover completely, then let it sit for 4 days, or until the temperature reaches ~55-60 C degrees (this is where a large compost thermometer comes in handy!*). Then with a fork, turn it over into a new pile, ensuring to mix the outside bits to the inside, and wetting again if needed. You want to mix well and for the temperature to reach ~60 C, to ensure you kill any weed seeds or pathogens, but too hot and your pile will go anaerobic, which isn’t good.

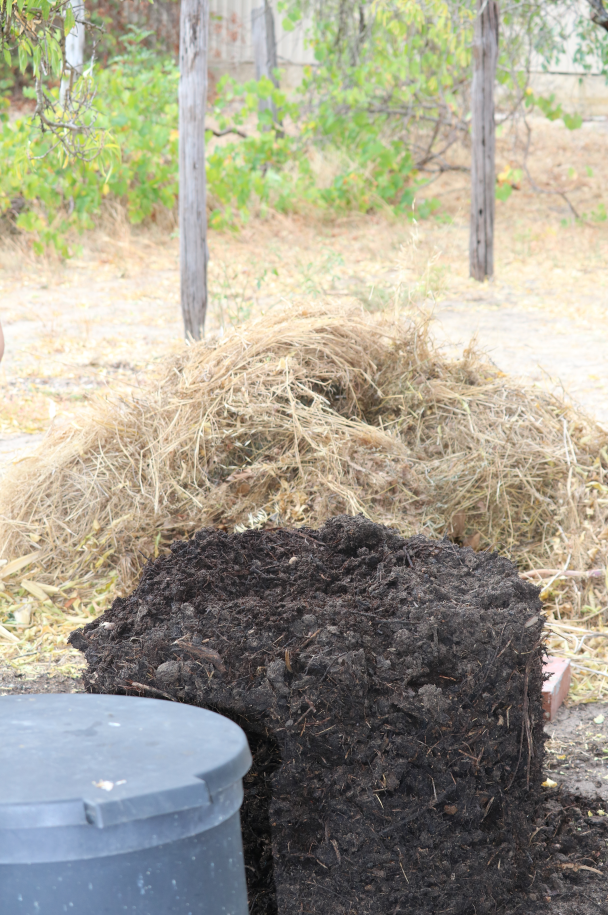
The end product of a hot compost pile should be dark, sweet smelling and with original components unrecognizable.
Cold composting is less scientific, you just need a closed container with two open ends and a lid.** Bury the wider side a few centimeters below the ground. All you need to do is throw in your kitchen vegetable waste adding shredded paper or dry leaves every now and then so it doesn’t go smelly and get too wet. Every now and then turn it round with a fork so that it airs and doesn’t go anaerobic. For more details on cold composting, see this info sheet prepared and generously shared by Rob Gully & Brenda Conochie of Greens Services WA.
With Bokashi bins you can use kitchen scraps of all kinds, for example meat, fish, dairy products, which aren’t usually a good idea for cold and hot composting. These scraps are pressed with a potato masher to exclude air, covered with a handful of bran, and sealed in an air-tight container. The bran is impregnated with good bacteria/fungus which ferment the food scraps. The only care required every so often is to drain the by-product; a bacteria rich juice, of the anaerobic composting. This is very easy with a commercial Bokashi Bucket which has a spigot for this purpose and can be diluted 1 to 20 and used as a tonic on the garden.
When the bucket is full, it is sealed shut and set aside for ten to twelve days. When the bucket is opened, the contents looks roughly pickled. This pre-compost needs to be buried in a spot in the garden for a few weeks to finish decomposition. Beware: It is still acidic, plant roots should not come in contact with it for two to four weeks.
*TTG members can borrow the Kitchen Gardeners’ meter long compost thermometer.
** You can buy large cold compost bins, cheaper than hardware stores ($49.50) from Environment House in Bayswater.